So the Raspberry Pi finally arrived from Santa on Christmas day, it’s taken me until now to get around to doing anything with it. I’ve a lot of ideas on what to do, I just need to decide on one. However the first step is to get it set up, and this is what this entry focuses on.
I’ll be using the great information out there, particularly from http://ww.raspberrypi.org and paraphrasing it where I can, or where it gets complex I’ll send you to the reference site, although hopefully this will be a one stop shop for those just starting with a RPi.
So lets get started, information in this section is primarily from Adafruit, an excellent online resource for any electronics so take a look there if you want the real detail behind what we are doing.
As we also recieved our first ever Mac I’ll be doing this on OSX.
Step 1: Preparing and SD Card
- Download the Occidentalis v0.2 (I am using this as it’s developed by Adafruit and includes the libraries for electronics integration – full details at Adafruit )
- Download RPi-sd card builder – This is required to prepare the image on the SDCard
- The next steps are direct from All the (*)ware and explain how to prep the SD card
- Run the app.
-
- If you receive a security warning you may need to change your Security and Privacy Settings
- Open “System Preferences” and then “Security & Privacy”
- Under General select Anywhere (you may need to unlock the padlock with an Admin account first)

- When you’re done you can change the settings back to the original ones
- Select the Occidentalis distributions (.img file).

- You will prompt with this. After you connect your sd card press continue.

- Now you have to select your sd card. BE CAREFUL, see the name and select ONLY one sd card.

- Now the program will need administrator privileges. insert your password.

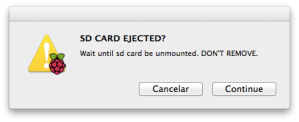
- Confirm that your sd card has been unmounted. When you confirm that, press continue. (this can take a while).
- If you receive the error message “Run Shell Script…” then this may be because there is a space in the path to your image file. If this is the case then remove the space and re-run the above steps.
- And it’s that….now you can connect your sd card to your raspberry pi…

Step 2 – Starting up your RPi
This is the easy part where you see your RPi come to life.
- Insert the SDCard into the RPi
- Connect the RPi to your display using wither HDMI or the composite port
- Connect a usb keyboard to the USB Port
- Power the RPi using a USB wall adapter or a cable connected to another computer
- That’s it! You should see the following screen:

Step 3: Configuring the Pi Settings
For a full list of the settings take a look at the AdaFruit Learning.
I changed the following settings:
- Expand root partition to fill SD card
- ssh – I enabled ssh access as I intend to stop using the TV – details in a later entry
- boot_behaviour – set to start up in desktop mode
That’s it for now, I am currently waiting for a usb wireless dongle to connect the RPi to my network and progress, as soon as I get that configured I’ll provide a further post.